Serverless Telegram Bot with Firebase

Using (free) Firebase Cloud Functions to start your first telegram bot, as always with Javascript.

1. Create your bot

Easy and fast:

  1. Search in telegram @BotFather or open this link
  2. Write the command “/newBot
  3. Follow all the steps
  4. Write down 2 things :
    1. bot name (finished in ‘bot’): In our example firebase_bot
    2. Secret Token (don’t miss it): in our example LONG_STRING_TOKEN
Telegram bot creation

2. Create your firebase project

Go to your firebase admin page

  1. Go to your firebase console https://console.firebase.google.com
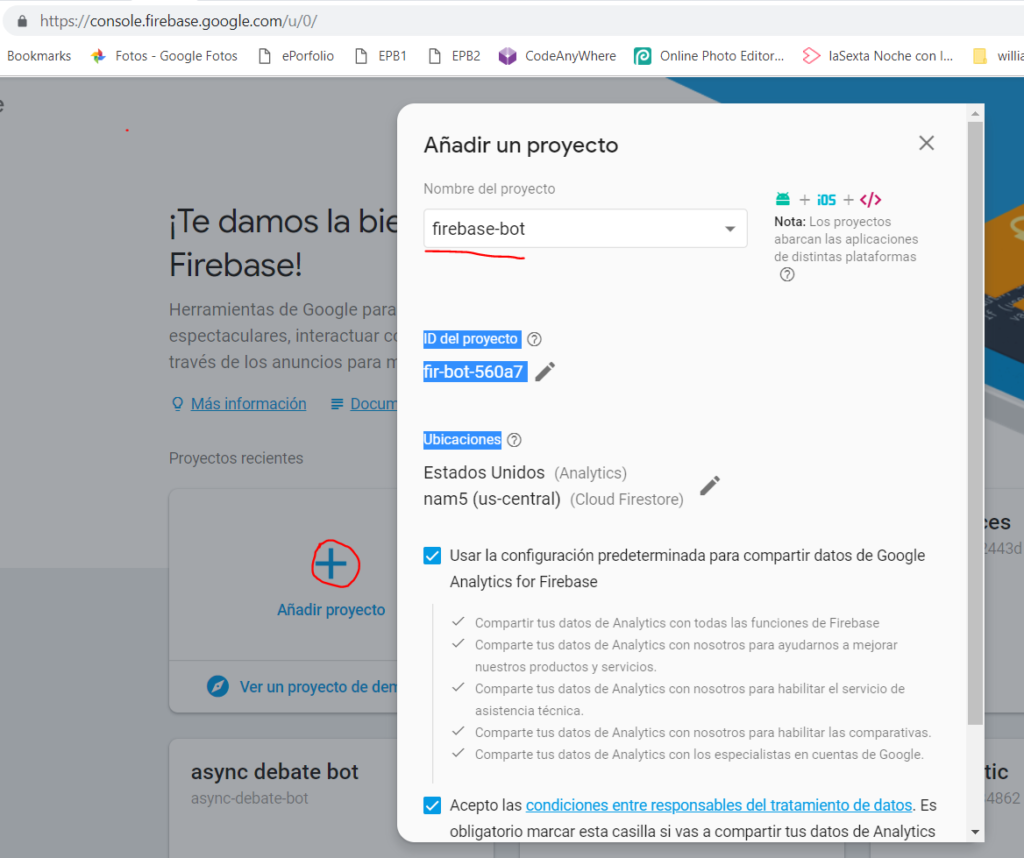
  2. Add a new project
  3. Write down the final id of the project: in our example firebase-bot-560a7
Firebase project creation

3. The code

I am going to assume you have Node and NPM installed in your system and you know how to use it

3.1 Set the enviroment

  1. Install globally firebase-tools: npm install -g firebase-tools
  2. Login into firebase: firebase login
  3. Create a folder and run: npm init inside
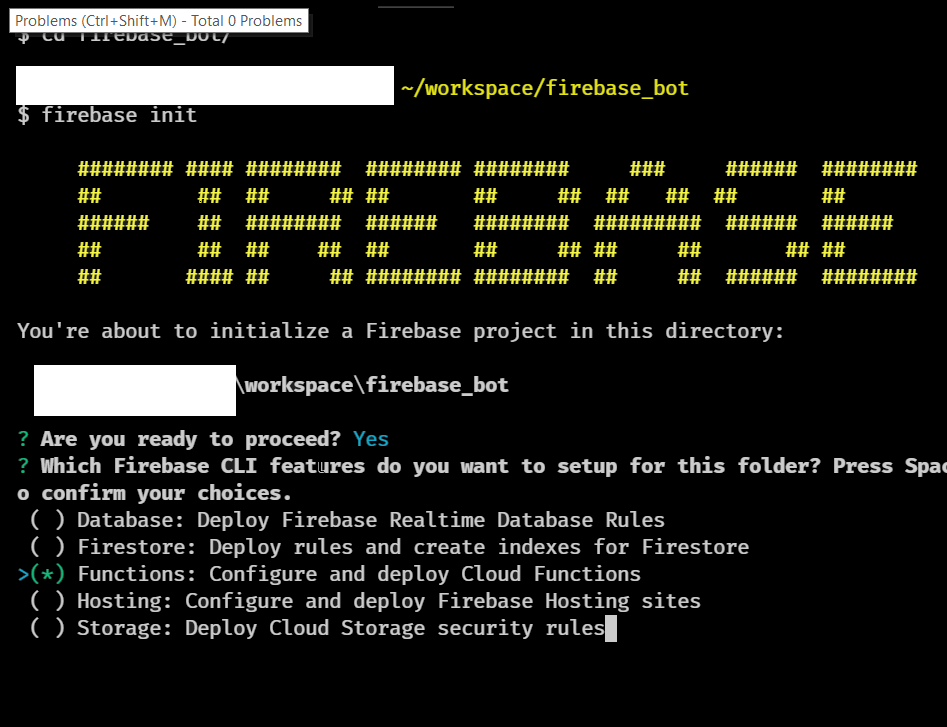
  4. Init firebase in the same folder: firebase init
  5. Choose: Functions: Configure and deploy Cloud Functions
  6. Select a default Firebase project:
    1. We have a firebase project id created on the point 2.3, if this is shown in the options choose it
    2. If the project is not there choose [create a new project] (we will pick the project later)
  7. Javascript or Typescript: (IMHO) Typescript
  8. TSLint: Yes
  9. install npm dependencies: Yes
  10. If in the point 6 you didn’t choose your firebase project set it now with: firebase use firebase-bot-560a7 (this has to be the id of your firebase project, point 2.3)
  11. install functions dependencies:
    • cd functions folder
    • npm install –save express cors

3.2 The actual code

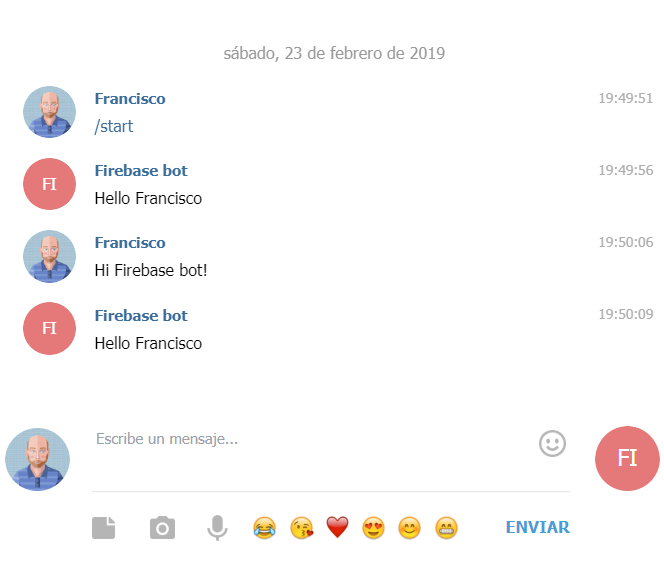
Our bot will reply to any telegram message with a “Hello message-user-first-name”

We are going to create a router function in order to be the single entry point for all telegram messages.

[codepen_embed height=”798″ theme_id=”0″ slug_hash=”ErqQLG” default_tab=”js” user=”pikilon”]See the Pen Simple Firebase Cloud Telegram Bot by Pikilon (@pikilon) on CodePen.[/codepen_embed]

3.3 Deploy your code

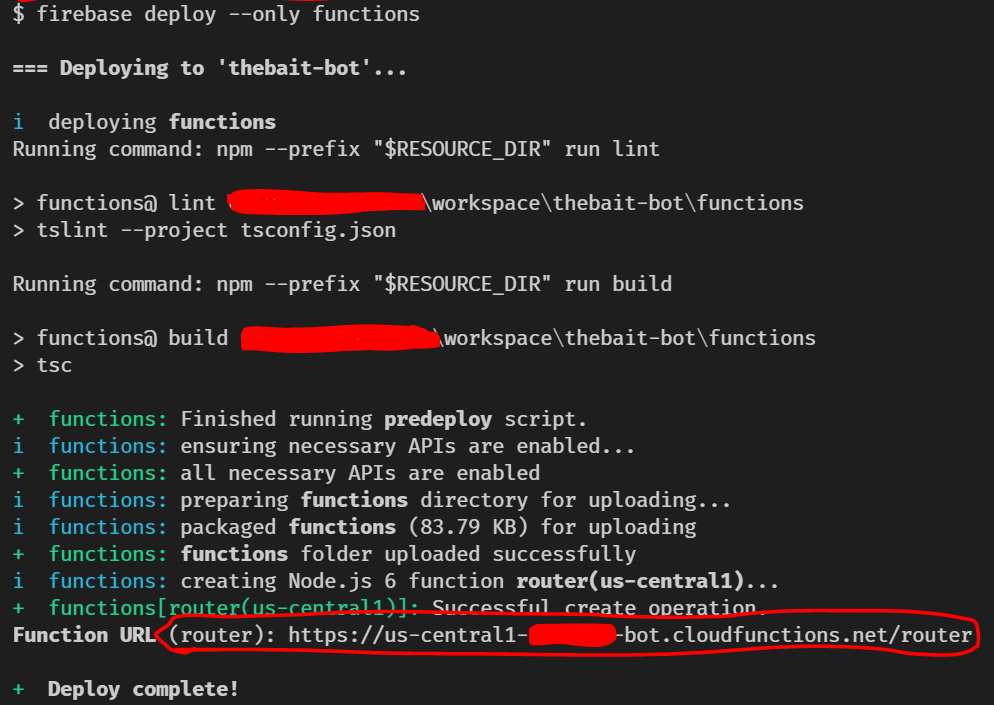
Now that you have create your bot code you need to upload it to firebase to be compiled and available

  1. In the root of your project run: firebase deploy only –functions
  2. Wait until the process finish and write down the router function url: in our case https://us-central1-firebase-bot.cloudfunctions.net/router

4. Bind the bot to Firebase

Now you have the bot, you have your firebase cloud function running, you only need to connect them.

  1. Go to your browser and put the bold text with your data, we have defined TOKEN in 1.4.2) and the url in 3.3.2 MAIN LAST “/”
    • https://api.telegram.org/botLONG_STRING_TOKEN/setWebhook?url=https://us-central1-firebase-bot.cloudfunctions.net/router/
  2. Check is set correctly going to https://api.telegram.org/botLONG_STRING_TOKEN/getWebhookInfo
Telegram bot and firebase binded

5. Check the results

Let see it in action!
Open your bot in telegram and say hello to your creation

Voilá

Rem + em, a love story

Not this REM but…

With the new times using javascript for everything on the frontend (React.js, Angular.js) CSS is targeting more and more modular coding.

This is why if you are progressing in CSS you should learn BEM naming conventions.

A common problem I found is the designer use REM units for everything (or even worst PX) because they fear if you use relative units it will be affected by the context, and they want the css rules to be as standalaone as they could. There is a mayor problem with this approach because if you create different sizes of the same component, or you want to change the layout you have to rewrite all the sized attributes. This means more code, more complexity, hard readability…

The solution is to use REM units in the parent and use EM in everychildren, so when you make only a big mediaquery in the body and it will adapt itself all the way down in the body.

Check out this example code I made in codepen.

[codepen_embed height=”265″ theme_id=”0″ slug_hash=”KqXbWr” default_tab=”css,result” user=”pikilon”]See the Pen <a href=’https://codepen.io/pikilon/pen/KqXbWr/’>CSS relative units in component layouting</a> by Pikilon (<a href=’https://codepen.io/pikilon’>@pikilon</a>) on <a href=’https://codepen.io’>CodePen</a>.[/codepen_embed]


Better bootstrap grid

Bootstrap is a great framework (if is in the right hands) and the grid system is one os the most used tools, but isn’t is very repetitive to write?

If your answer is yes you’ll like this unobtrusive bootstrap addon I made. Make grid faster, without writing “col-md-2” six times (in each column).

I add two more things: no-gap columns and a 10 columns based grid (using col10-*-* and .row.base10-*-*)

And you can see documentation and download the file in my github here
You have an example here

[codepen_embed height=”265″ theme_id=”dark” slug_hash=”vKBgJp” default_tab=”result” user=”pikilon”]See the Pen <a href=’https://codepen.io/pikilon/pen/vKBgJp/’>Bootstrap addon better grid (add it before the bootstrap library)</a> by Pikilon (<a href=’http://codepen.io/pikilon’>@pikilon</a>) on <a href=’http://codepen.io’>CodePen</a>.[/codepen_embed]

Implement Lazy Responsive images in your wordpress

Webpages are read from top to bottom, and by bottom I mean the end of the whole content, even the one you are never going to see.

Video is the most bandwidth consumer in internet, but if you are in your phone, the browser will protect you avoiding video “autoplay”, but no with the images. So, sometimes, the browser will save your data plan avoiding play a 200 Kb background video, but it will be ok if the proud guy with the portfolio decided to put 30 Mb of images on a single page.

But because surely a lot of readers don’t give a damn about clients data plans I’ll say the magic words: Save bandwidth is very good for SEO. Less Mb = more speed loading = better ranking. Google knows that regular user is impatient and will hit “back” on a search result if takes long to load.

What is a lazy image? An image that will not download any data until is visible in the screen. Usually it’ll start to load when is closer to be seen, avoiding the wait to show up. So if you fill the site with hundreds of images it won’t matter until you scroll down. The browser doesn’t do it by itself so we’ll need a javascript solution.

We are saving a lot of data here, but it is not enough.

Very often you see a really big image in a very small screen. Imagine an slider with 5 images of 1200×700 px, and you are seen them in portrait mode in a 720×1280 screen, so in the end, you’ll  see five 720×420 images with 4 times more (surface) weight they should have.


[lazy_responsive_img ids=”144″]

EG: 600×600 images shown as 150×150, and some PNGs!

What is a responsive image? An image with a set of source files that will load the closer to the size is been seen. It is included in HTML5 and it can be coded in two ways, adding a “srcset” attribute to an <img> tab or use the HTML5 “picture” tag with different sources.  I am not going to repeat the great article from Smashing magazine with all the info you are gonna need.

It has one big annoying issue, you have to calculate (using media queries) which file to serve using mediaqueries, a good pain in the ass.

Shouldn’t be great have one solution to have lazy images and auto-responsive-images?  meet lazysizes

This great plugin allows you to release this feature today (take care, not IE8 supported).

So you want to use this on your WordPress theme, you don’t find the right plugin, and you want to learn how to do it, here you have what came with, put it on your functions.php o create a plugin, hope you like it!

[gist id=”e6f8a1f1397efa9019de”]